
Tutorial: 12 Ideas Using Stencils
Hello friends, Eloise here and today I’m here to share twelve ideas on how to use the Pretty Pink Posh stencil bundle #1. In today’s video, I’m just sharing the techniques and hopefully in my next video I’ll share some ideas using the backgrounds I made.
Watch the video above I Watch the video in HD on YouTube
Working from left to right, here is how I made each background.
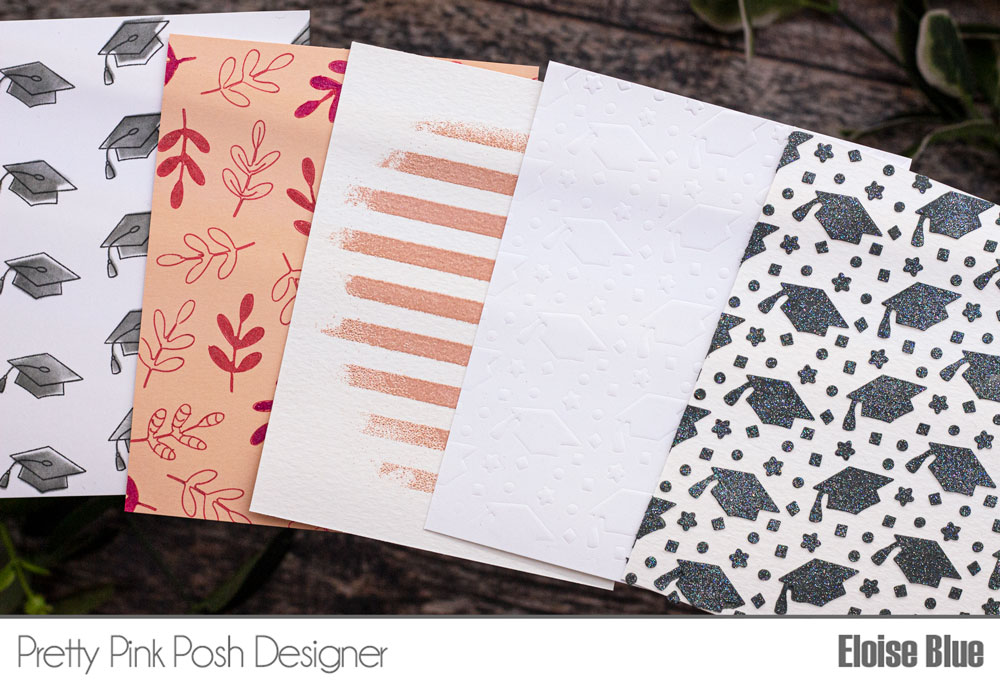
#1 – Colour then Stamp. For this first background, I took a piece of white cardstock, adhered it down and adhered my Graduation Stencil over the top. I then used washi tape to mask over the other images besides the hats. I ink blended some Black Soot Distress Oxide Ink over the top. I then removed the stencil and stamped over the hats using the Congrats Grad stamp set. Super simple and easy background with these stamps that match. If you want the confetti images back from the stencil, line up the stencil and then mask off the hats instead and ink blend over the rest of the areas.
I also did the same technique using the Leaves Stencil and Mother’s Day stamp set, which I will share the quick and easy card I made with that background at the end of the post.
#2 – Tracing. I took a piece of apricot coloured cardstock and adhered it down into place. I then laid over the Leaves Stencil and traced around the shapes with gel pens. Then to show some examples I coloured a few in, drew random patterns in some or you can trace with a black pen and colour with a different colouring medium. I liked this idea more for a larger stencil with larger spaces to colour. But it still turned out okay and is another fun way to get more from your stencils.
#3 – Heat Embossing. I taped down a piece of white cardstock and adhered the Wide Stripes Stencil over. I then smooshed down my Versamark Ink and added some Rose Gold Embossing Powder over the top. I took a brush and brushed away some of the powder on the outsides and heat set it with a heat tool. I liked this way since you can use any embossing powder you own and being able to brush away whatever powder you don’t want is kinda nice so you can keep it in different areas.
#4 – Dry Embossing. I think this is definitely one of my favourite ways to use stencils. I ran a piece of white cardstock with my Graduation Stencil over the top through a die cutting machine. I made sure to use a metal shim and also the rubber embossing mats to allow the stencil to emboss and tada, the stencil pattern is embossed. I think why I like this way the best is because you can use it as a subtle background, add colour inside, etc. Also, stencils are cheaper than embossing dies which is also nice, as well.
#5 – Embossing Paste. I used some Texture Paste from Ranger and dyed it using Black Soot Distress Oxide Ink. I then took a piece of white cardstock, adhered it down and then adhered the Graduation Stencil over the top. I used a palette knife to spread the paste over and then before it dried, I sprinkled glitter over the top just for some added interest, but either way it looks good. I then removed the stencil (remember to clean it straight away) from the paper and set it aside to dry. Embossing Paste was huge a while ago and I still really like it; the clean-up is a little messy though.
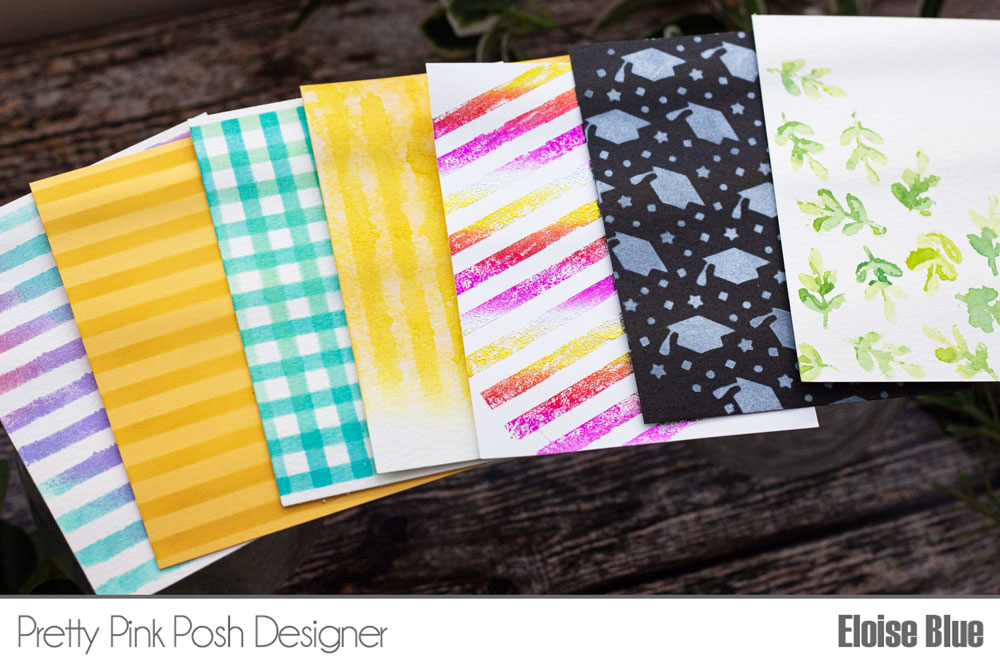
#6 – Paints. So, for my next background, I used some acrylic paints. I have some Kaisercraft ones since I picked them up super cheap. I took a piece of white cardstock and put the Wide Stripes Stencil over the top. I then used little paint daubers and three colours of paint; a lavender, dusty pink and aqua and dabbed the colours over the stencil. I then removed the stencil and let it aside to dry. I really liked using the paints, I always look at paints as not really a card making supply. But using them over stencils just looks like Distress Oxide Inks or something; they blend really nice and they’re cheaper.
#7 – Tone on Tone. This one is super simple, not a lot of thought went into it but basically, I just wanted to create my own patterned paper. I love tone on tone and it’s definitely my most used patterned paper. So, using a light colour of cardstock; in my case yellow and then a darker yellow ink, I used the Wide Stripes Stencil and ink blended over it. Super simple but being able to create these easy backgrounds, eliminates me running out of my favourite pieces of patterned paper.
#8 – Layering. Layering stencils are super fun. I like it especially when you have a really open design and then you can layer like a polka dot or something over top to give it a little fake texture. But in this case, I ink blended some blue inks over the Wide Stripes Stencil horizontally, then rotated it 90 degrees, and ink blended the same colours again. This created a checkered sort of effect and brought new opportunities to a simple design of stencil.
#9 – Bleaching. To do the bleaching effect, I ink blend some Distress Inks / Oxide Inks (I’m using these because they react with water) onto watercolour paper. I then laid the Wide Stripes Stencil over the top and sprayed over it with water. I blotted the paper with a paper towel and picked up the stencil. The parts where the stencil was stays the bright colour and the bits in between go lighter. I love the way this works out, it’s perfect for sunrays or a night sky or even to create the same tone on tone effect as earlier.
#10 – Foiling. So, a little while ago I got some Deco Foil Adhesive which is super cool for those of us that don’t have any machine to foil with. I took a piece of white cardstock, laid over the Wide Stripes Stencil at a diagonal and taped it down. I then took some of the liquid adhesive and a paint dauber and dabbed it over the top. Remember, whatever texture is left behind when you lay the adhesive down, the foil is going to pick up that texture. I set it aside to dry for around half an hour and then took a piece of foil, laid it over top and rubbed over the foil with my fingers where the adhesive is. I also used a bone folder at the end to really help stick down the last few bits. Foiling is super pretty and honestly; I will use it a lot more now that I don’t have to use a machine.
#11 – White Ink. I love using white ink on a dark colour of cardstock. It’s perfect for easy night skies, etc. This time I used the Graduation Stencil and ink blended white ink over the top of a black piece of cardstock. Super simple, but effective. You could do this with lighter colours of cardstock as well to create a more tone on tone effect as well.
#12 – Watercolour. Last idea this time around is to use watercolour. Watercolour is one of my favourite mediums since it’s so free flowing and gorgeous. So, I used the Leaves Stencil and a watercolour palette and painted over a selection of the leaves. I used two different tones of greens for them. I then lifted up the stencil and mopped up a few of the really wet areas with a paper towel. Obviously, this isn’t going to look perfect, but I like how it’s not perfect since it looks like you water coloured them yourself… even though you didn’t.
Mediums Used: Distress Oxide Inks, Watercolour Palette, Embossing Paste, White Ink, Foil, Deco Foil Adhesive, Acrylic Paints, Die Cutting Machine, Embossing Powders
So that’s the twelve ways I’m sharing on how to use stencils today. I then went off camera to create a card with one of the backgrounds.
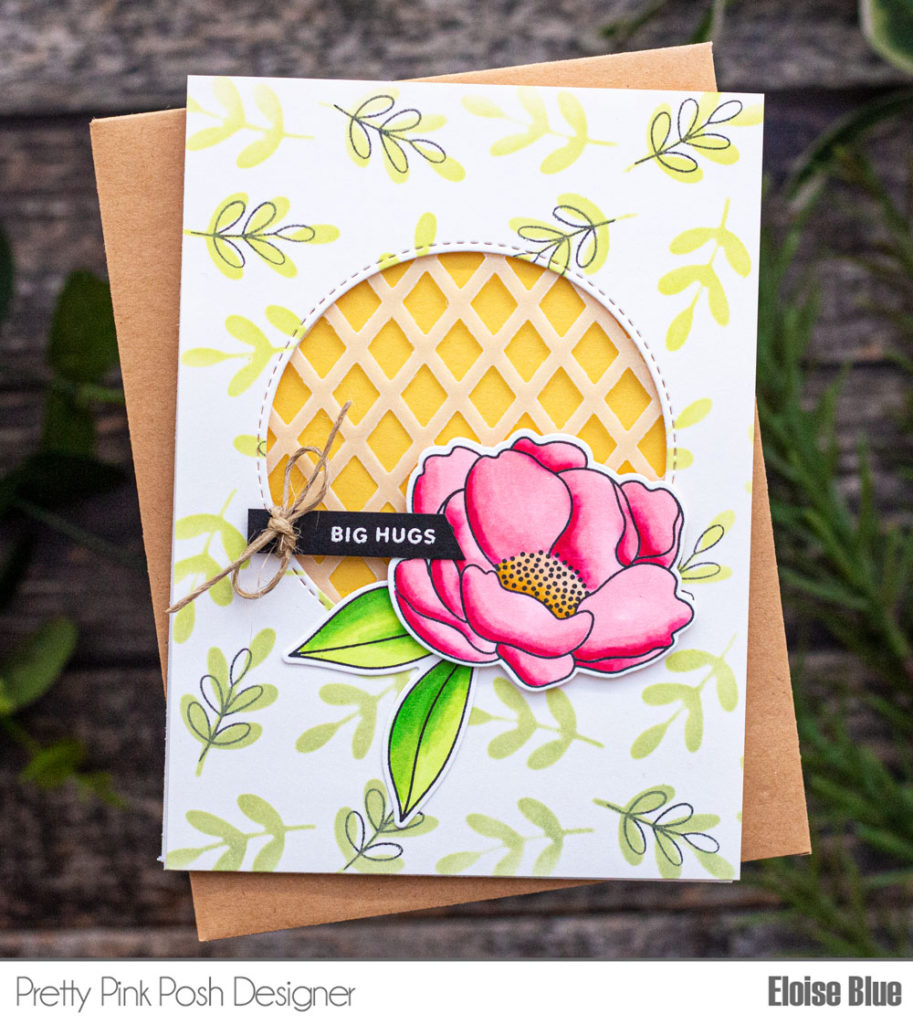
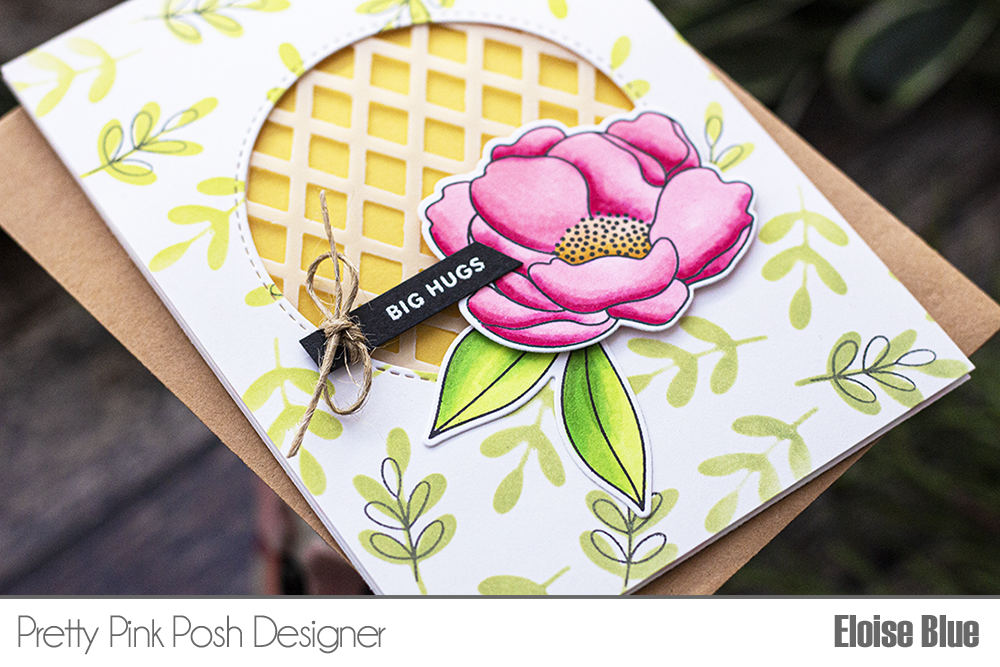
To start off my card, I stamped a couple of images from the Peonies stamp set and coloured them with Copic Markers. I then cut them out with the Peonies coordinating dies.
Copic Markers Used: RV21, RV23, RV25, RV29 / Y11, Y13, YR23, YR24 / YG01, YG23, YG07, YG17
I then took one of the leaves backgrounds that I made in my video and die cut a circle from the centre. While I was die-cutting I cut the Lattice Background Die from vellum as well. I adhered the vellum lattice behind the circle and popped up the entire background on foam tape and adhered it to a yellow card base.
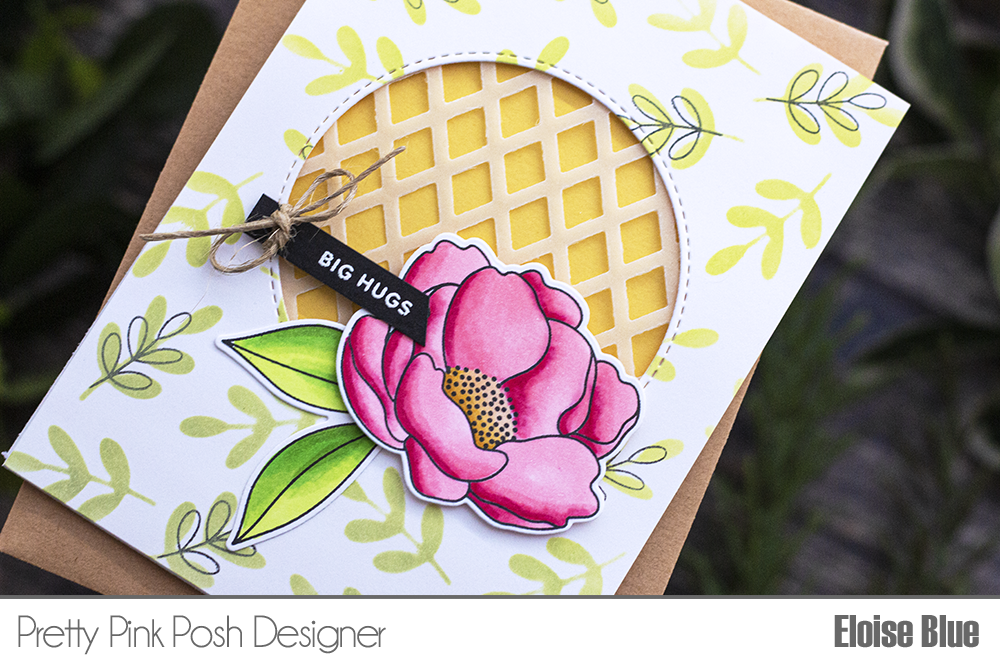
I then popped up the images on foam tape and adhered them into place as well. For my sentiment I used the ‘Big Hugs’ one from Elephant Friends and white heat embossed it onto a thin black strip of cardstock. I then tied a little hemp cord bow on one side and adhered that onto my card as well.
So, that finished up my super simple card for today as well as all the backgrounds I made. In my next video, I’ll be sharing a few card ideas using the backgrounds I made today.
Thanks so much for stopping by today and I’ll see you next time.
Wow! All types in one single post! Very informative and handy, I’m bookmarking this :) Thank you :)
Thanks for all the great ideas!!!
Thanks for the great tips and tricks..
Thank you, thank you, thank you for video of how to handle our stencils in so many varied ways. I appreciate that you shared that. Again, thank you.