
Floral Theme & Sale Week- Day 1
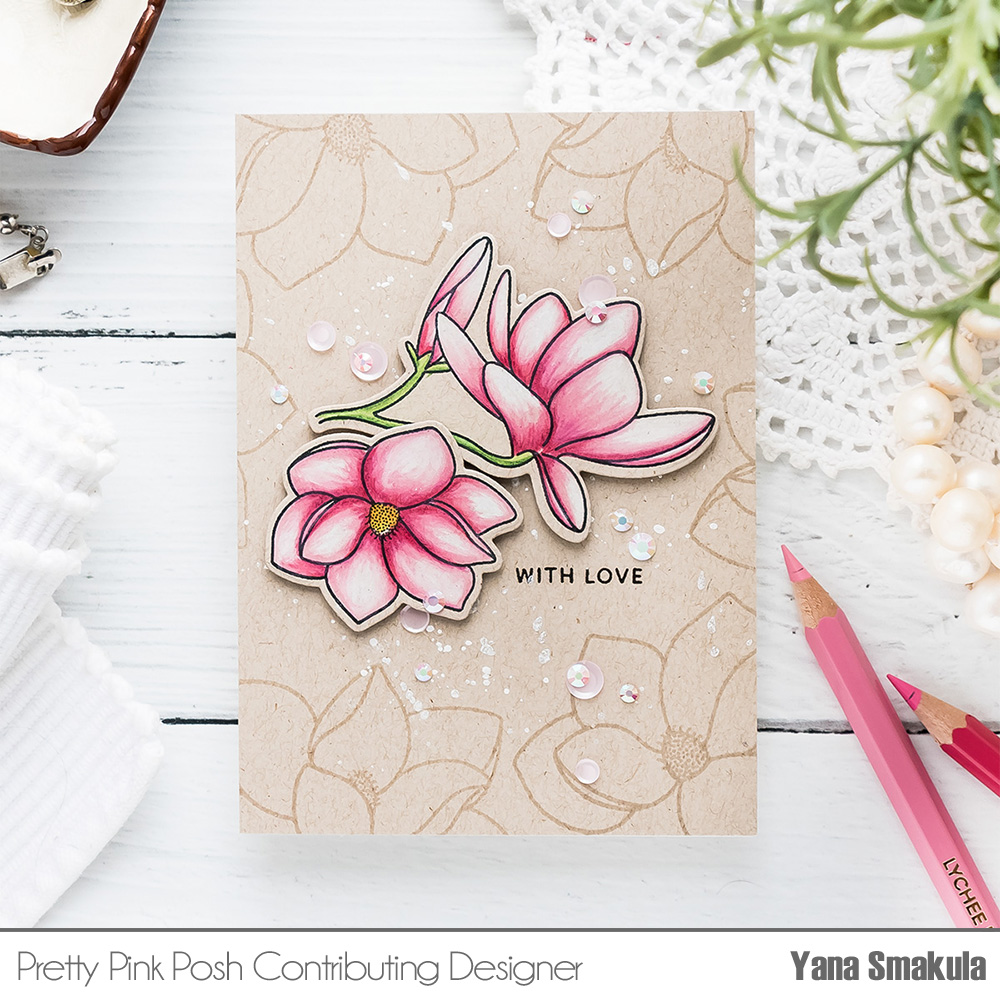
Hello, Pretty Pink Posh’ fans! This is Yana Smakula. I love to use colored pencils to color my stamped images with, they add a lot of interest and intricate details to all sorts of images, but especially flowers. Today I’m sharing a simple coloring tutorial featuring Magnolia Flowers stamp set and Chameleon Color Tones pencils.
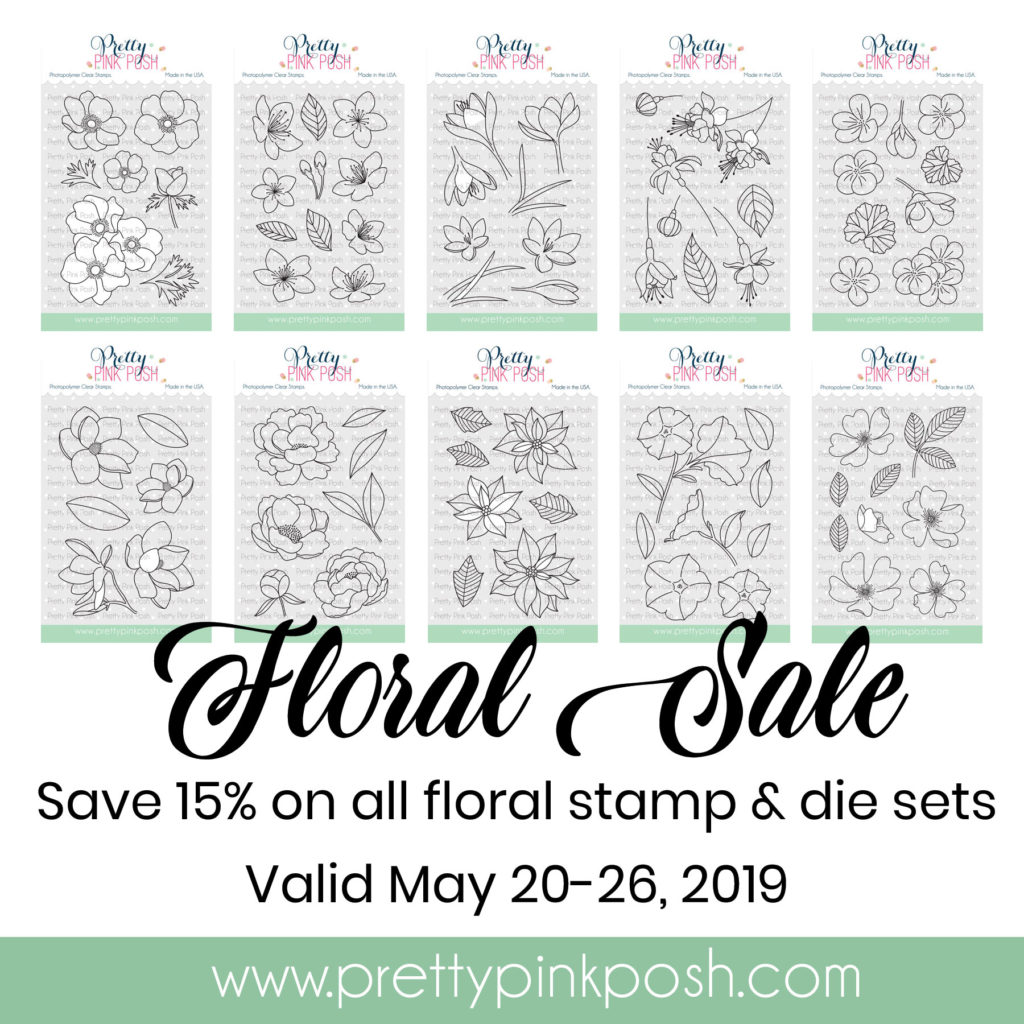
All items in the Floral section are 15% off this week!
Watch my video tutorial below to learn how I made this card.
Watch the video above I Watch the video in HD on YouTube
I selected 2 flower images from the Magnolia Flowers stamp set and my plan was to stamp them in black ink onto kraft paper, color with pencils and re-stamp flower outlines with black ink again for a nice crisp black line. To be able to do this I used a MISTI stamping tool. You can skip this step and stamp your images using a clear block and perhaps re-outline the image boundaries with a black pen, or even skip re-applying the black outline altogether, but I think taking that extra step is what makes the finished card look extra nice.
If you do use a stamping tool remember to keep the stamps in the tool and not remove them.
I wanted to use Chameleon Color Tones pencils for my coloring. This is a new to me product, something I came across when visiting the CreativeWorld show in Germany this winter. I was intrigued by these pencils because they are double sided. One pencil has 2 colors built into it, for example, a light pink and dark pink. I have a 25 pencil set, and because the pencils are double sided this gives me 50 colors, plenty to chose from to create beautifully colored images. Pencils come in a nice display case and I’ve found them to be very easy to use.
I picked a few pencils for my card: 2101 Pear and 2102 Basic colors for the green pencil; 101 Soft White (there’s also cream, but I am only used white), 801 Lychee and 802 Strawberry, and finally 901 Warm Pink along with 902 Plum.
I prefer to color with colored pencils on non white paper as when I’m coloring on white I can always use my translucent coloring mediums, such as Copic markers, for example, these pencils are opaque or semi-opaque and that means I can color with their help over not just white surfaces, but dark surfaces too and still have beautiful vibrant results. The paper I colored my image on is Neenah Desert Storm 80lb Cardstock.
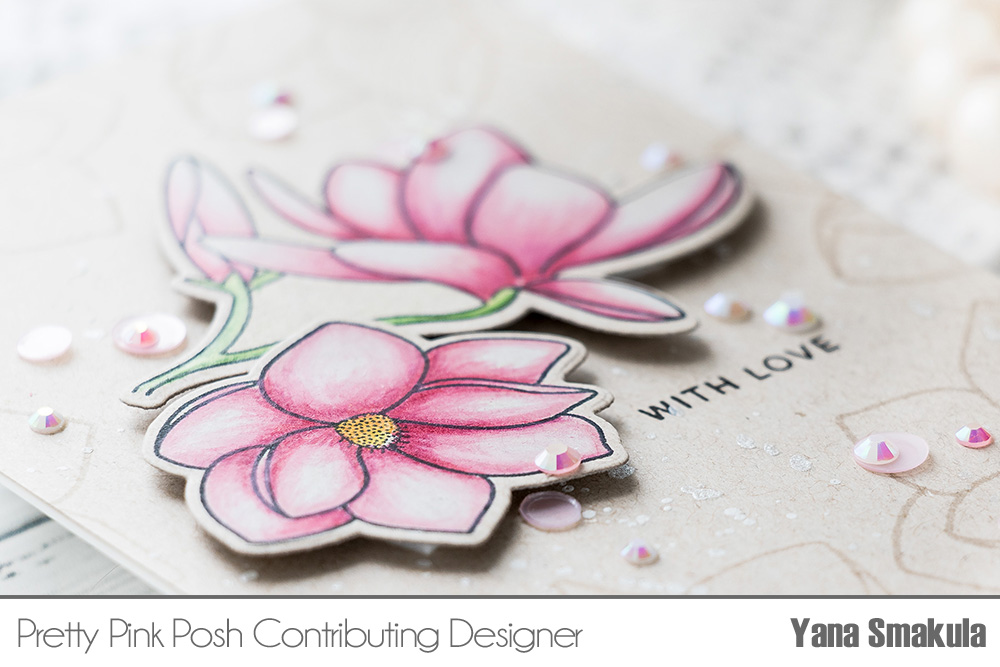
Even though each pencil has 2 shades, it doesn’t mean you have to use only those shades for your coloring. I used a white pencil, and light shades from 2 different pencils to color the petals. I went back to the darker shades of my pencils to add deeper shadows and a beautiful dimension to the flower petals.
I love using colored pencils for images like these as I can sharpen my pencils to a very fine point and have the smallest, finest stroke details on my petals. This is something I can’t really achieve with Copic markers, the tip of the markers is just never that fine.
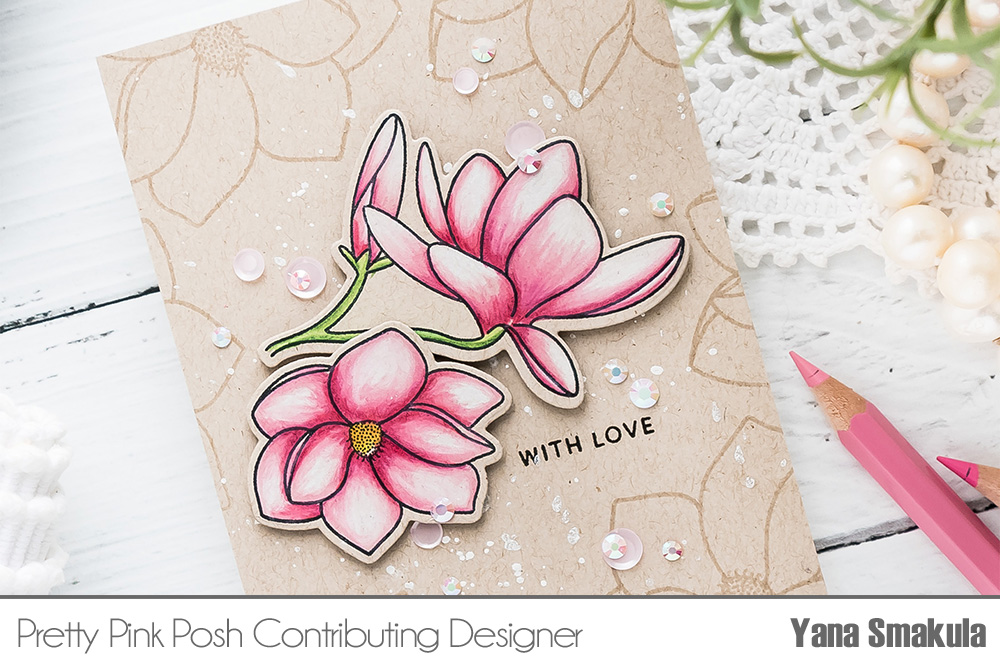
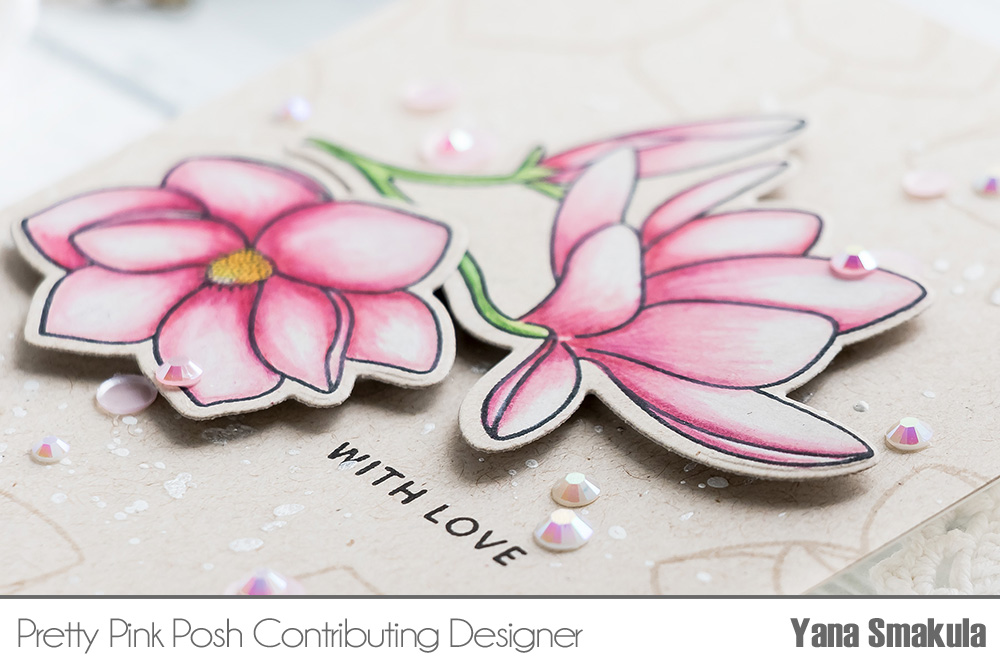
Once my coloring was done I placed the image back inside my MISTI tool, made sure nothing shifted, inked up the stamps and re-stamped the black outlines to make them crisper. There are coordinating dies available so I used mine to cut these gorgeous flowers out.
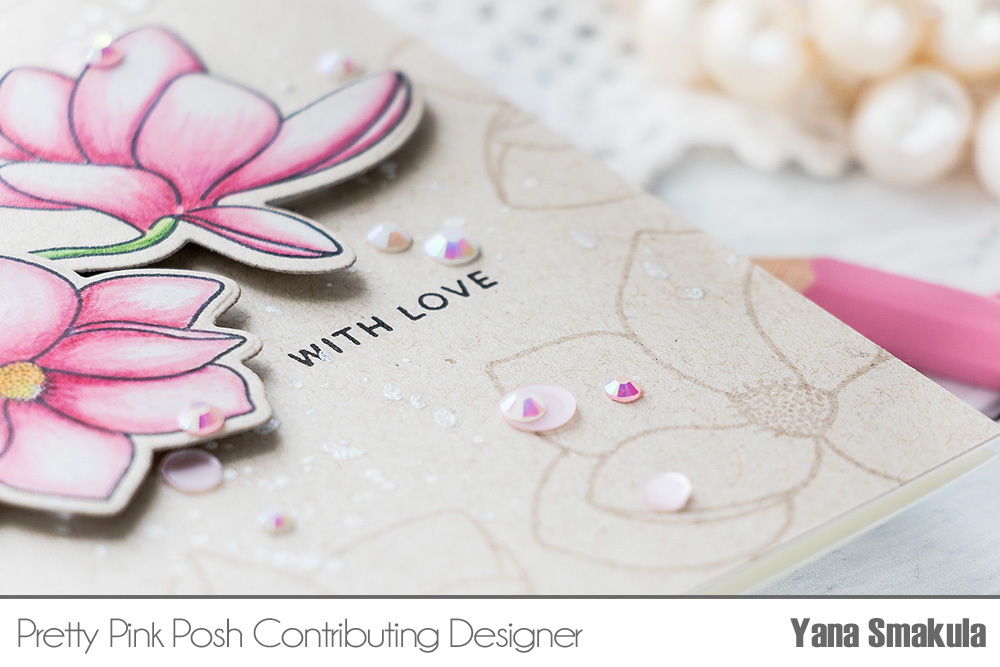
Next, I positioned the flowers on the background panel and having figured out the placement I stamped a simple “with love” sentiment in black ink. This message comes from the Floral Hearts stamp set. To spice my background up a bit, I added some splatter. For this, I used a shimmer spray from my stash and just pattered some of it into the background. Next, I used foam adhesive and adhered the flowers in place.
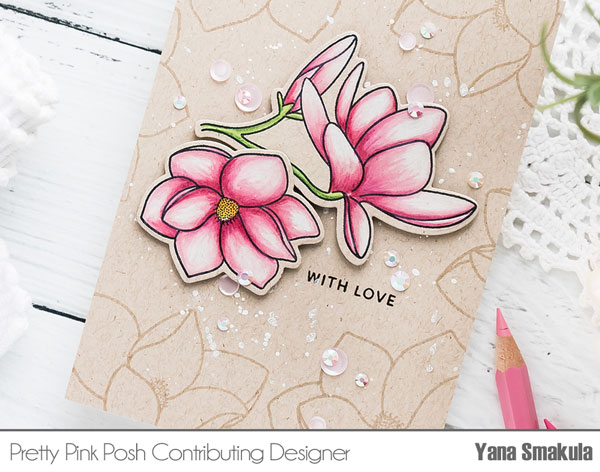
At this point, the background still looked a bit blank, so I decided to trim it down to a smaller size to make this card into a 4Bar instead of A2 and also to stamp some additional flowers using tone on tone stamping technique.
I pulled out my watermark embossing ink and some additional magnolias from this stamp set and stamped several flowers around the edges of the panel framing my focal point. Using the watermark ink gave me beautiful soft impressions on the paper that blended well with the rest of the background.
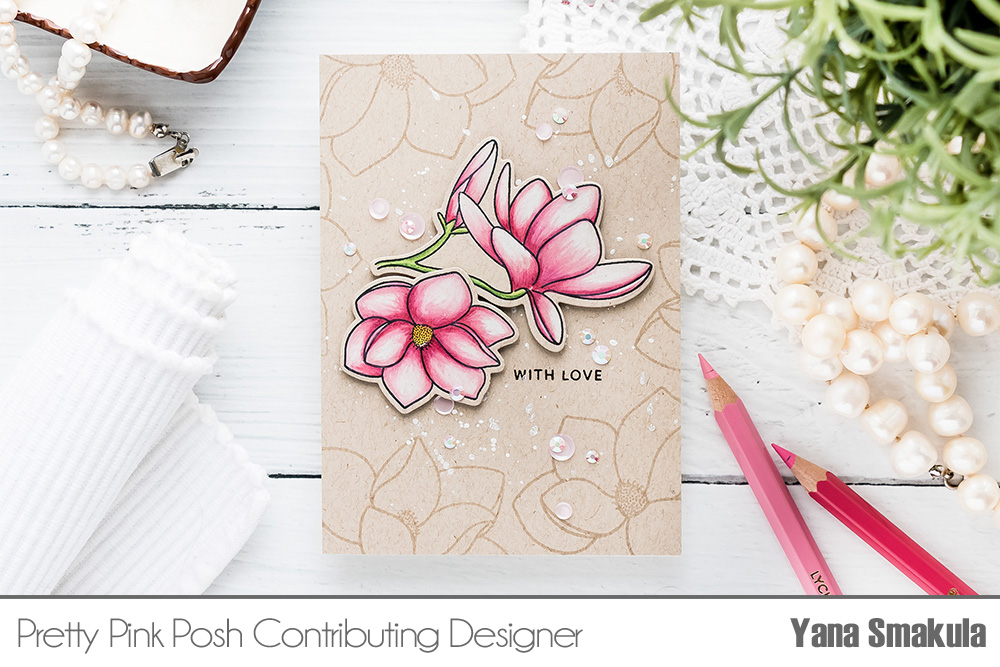
Finally, I used some sequins and jewels to embellish this card. I went with pretty Easter confetti mix using just some pale pink sequins and Valentine Jewel mix using white and light pink jewels. As always, I adhered these in place using my trusty Crystal Katana tool.
We will be having new inspiration every day using a different floral set to coordinate with our floral sale. Hope you’ll join us again tomorrow!
Beautiful coloring as always!! Love the floral background too :)
Love all the florals that have been released this Spring. Soooooo versatile and inspiring for cards.
My best friend bought those pencils for me, and I love them. I take them on trips with me because I they only take up 1/2 the space (double ended). I love your tip about inking the image at the end to make the black stand out. I have never thought of that–the colored pencils cover some of the black ink, but this will do the trick. So glad I saw your post :)
So beautiful Yana. I am going to check out those pencils. It would save room when traveling. That soft pink is so lovely.
What a gorgeous card! I love how you colored the floral images. :)